
gitlab中文官方文档
Centos7安装gitlab中文文档:https://www.gitlab.com.cn/installation/#centos-7

Centos6安装gitlab中文文档:https://www.gitlab.com.cn/installation/#centos-6
百度链接:
https://pan.baidu.com/s/1MBKNxkJ6e857IvBBxC8_BQ 密码:jibx
使用yum localinstall进行安装
gitlab-ctl reconfigure ##初始化即可访问
1.安装并配置必要的依赖关系
在CentOS 7(和RedHat / Oracle / Scientific Linux 7)上,以下命令为将在系统防火墙中打开HTTP和SSH访问。
[root@node01 ~]# yum install -y curl policycoreutils-python openssh-server [root@node01 ~]# systemctl enable sshd [root@node01 ~]# systemctl start sshd[root@node01 ~]# systemctl start firewalld.service [root@node01 ~]# firewall-cmd --permanent --add-service=http success [root@node01 ~]# systemctl reload firewalld ##上述命令,安装ssh 配置防火墙。
接下来,安装Postfix发送通知邮件。如果您想使用其他解决方案发送电子邮件,请跳过此步骤并在安装GitLab后配置外部SMTP服务器。
##安装postfix(邮件通知)
[root@node01 ~]# yum install -y postfix
[root@node01 ~]# systemctl enable postfix
[root@node01 ~]# systemctl start postfix
2.添加GitLab软件包存储库并安装软件包
添加GitLab软件包存储库。
yum方式安装 gitlab-ce 社区版,ee是企业版需要收费
curl -sS https://packages.gitlab.com/install/repositories/gitlab/gitlab-ce/script.rpm.sh | sudo bash
yum install -y gitlab-ce
##镜像地址
rpm -ivh https://mirrors.tuna.tsinghua.edu.cn/gitlab-ce/yum/el7/gitlab-ce-8.9.5-ce.0.el7.x86_64.rpm
编辑gitlab.rb
[root@node01 ~]# vim /etc/gitlab/gitlab.rb
[root@node01 ~]# egrep -v "#|^$" /etc/gitlab/gitlab.rb
external_url 'http://118.190.201.68'
gitlab_rails['gitlab_email_from'] = '443060965@qq.com'
gitlab_rails['gitlab_email_display_name'] = 'Kyle_Gitlab'
gitlab_rails['gitlab_email_reply_to'] = '443060965@qq.com'
gitlab_rails['smtp_enable'] = true
gitlab_rails['smtp_address'] = "smtp.qq.com"
gitlab_rails['smtp_port'] = 25
gitlab_rails['smtp_user_name'] = "443060965@qq.com"
gitlab_rails['smtp_password'] = "@sangor123.com"
gitlab_rails['smtp_domain'] = "smtp.qq.com"
gitlab_rails['smtp_authentication'] = :plain
gitlab_rails['smtp_enable_starttls_auto'] = true

#unicorn默认使用8080,除非你修改这里,否则请保持系统8080无占用。
#unicorn['port'] = 8080
让配置生效(以后每次编辑gitlab.rb都要重新配置):
[root@node01 ~]# firewall-cmd --zone=public --add-port=8080/tcp --permanent [root@node01 ~]# firewall-cmd --reload[root@node01 ~]# gitlab-ctl reconfigure ##初始化,就执行一次
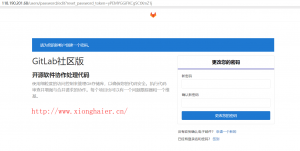
浏览器输入地址进行设置密码

3.gitlab进行汉化
汉化具有一定的风险建议先做好快照,特别是虚拟机
日志文件 /var/log/gitlab/gitlab-rails/sidekiq.log
最后,善用 gitlab-ctl tail unicorn这个监控命令。
#gitlab-ctl stop
#cat /opt/gitlab/embedded/service/gitlab-rails/VERSION //查看版本
10.3.5
#git clone https://gitlab.com/xhang/gitlab.git
#cd gitlab
#cat VERSION
10.3.5    //恰好版本相同,如果不同要diff换一下。
#git diff
疑难杂症参考:
http://blog.csdn.net/wangxicoding/article/details/43738137
###################################################################################
此处只作为记录与上文无关
###################################################################################
命令行指令
Get busy living or get busy dying. 努力活出精彩的人生,否则便如行尸走肉
如无特殊说明,文章均为本站原创,转载请注明出处
- 转载请注明来源:git系列之搭建gitlab服务及汉化
- 本文永久链接地址:https://www.xionghaier.cn/archives/327.html