
1.块存储服务
块存储服务(cinder)为实例提供块存储。存储的分配和消耗是由块存储驱动器,或者多后端配置的驱动器决定的。还有很多驱动程序可用:NAS/SAN,NFS,ISCSI,Ceph等。![]()
典型情况下,块服务API和调度器服务运行在控制节点上。取决于使用的驱动,卷服务器可以运行在控制节点、计算节点或单独的存储节点。
1.1块存储服务概念
OpenStack块存储服务(cinder)为虚拟机添加持久的存储,块存储提供一个基础设施为了管理卷,以及和OpenStack计算服务交互,为实例提供卷。此服务也会激活管理卷的快照和卷类型的功能。
块存储服务通常包含下列组件:
cinder-api
接受API请求,并将其路由到“cinder-volume“执行。
cinder-volume
与块存储服务和例如“cinder-scheduler“的进程进行直接交互。它也可以与这些进程通过一个消息队列进行交互。“cinder-volume“服务响应送到块存储服务的读写请求来维持状态。它也可以和多种存储提供者在驱动架构下进行交互。
cinder-scheduler守护进程
选择最优存储提供节点来创建卷。其与“nova-scheduler“组件类似。
cinder-backup守护进程
“cinder-backup“服务提供任何种类备份卷到一个备份存储提供者。就像“cinder-volume“服务,它与多种存储提供者在驱动架构下进行交互。
消息队列
在块存储的进程之间路由信息。
2.安装并配置控制节点
这个部分描述如何在控制节点上安装和配置块设备存储服务,即 cinder。这个服务需要至少一个额外的存储节点,以向实例提供卷。
2.1先决条件
2.1.1在你安装和配置块存储服务之前,你必须创建数据库、服务证书和API端点
1.完成下面的步骤以创建数据库
- 用数据库连接客户端以 root 用户连接到数据库服务器
#建库及授权
[root@controller ~]# mysql -u root -p123456
#建库
CREATE DATABASE cinder;
#授权
GRANT ALL PRIVILEGES ON cinder.* TO 'cinder'@'localhost' \
 IDENTIFIED BY 'CINDER_DBPASS';
GRANT ALL PRIVILEGES ON cinder.* TO 'cinder'@'%' \
 IDENTIFIED BY 'CINDER_DBPASS';
- 退出数据库客户端。
2.获得 admin 凭证来获取只有管理员能执行的命令的访问权限
[root@controller ~]# source admin-openrc
3.需要要创建服务证书,完成这些步骤
- 创建一个 cinder 用户
[root@controller ~]# openstack user create --domain default --password cinder cinder
+-----------+----------------------------------+
| Field     | Value                            |
+-----------+----------------------------------+
| domain_id | 30c495cbb6e145cd9e70ffb825c0c710 |
| enabled   | True                             |
| id        | 8f40ac7b9b5546cbbbb1fb40d169d5a6 |
| name      | cinder                           |
+-----------+----------------------------------+
- 添加 admin 角色到 cinder 用户上
[root@controller ~]# openstack role add --project service --user cinder admin
- 创建 cinder 和 cinderv2 服务实体
[root@controller ~]# openstack service create --name cinder \
 --description "OpenStack Block Storage" volume
+-------------+----------------------------------+
| Field       | Value                            |
+-------------+----------------------------------+
| description | OpenStack Block Storage          |
| enabled     | True                             |
| id          | e169a871420b492cb2c2ca56ac74c684 |
| name        | cinder                           |
| type        | volume                           |
+-------------+----------------------------------+
[root@controller ~]# openstack service create --name cinderv2 \
 --description "OpenStack Block Storage" volumev2
+-------------+----------------------------------+
| Field       | Value                            |
+-------------+----------------------------------+
| description | OpenStack Block Storage          |
| enabled     | True                             |
| id          | 4217acf2eb8347bfa29eb89e7ac451e9 |
| name        | cinderv2                         |
| type        | volumev2                         |
+-------------+----------------------------------+
块设备存储服务要求两个服务实体。
4.创建块设备存储服务的 API 入口点
[root@controller ~]# openstack endpoint create --region RegionOne \
 volume public http://controller:8776/v1/%\(tenant_id\)s
+--------------+-----------------------------------------+
| Field        | Value                                   |
+--------------+-----------------------------------------+
| enabled      | True                                    |
| id           | 531384c71edc470684ea0b6567bfdecb        |
| interface    | public                                  |
| region       | RegionOne                               |
| region_id    | RegionOne                               |
| service_id   | e169a871420b492cb2c2ca56ac74c684        |
| service_name | cinder                                  |
| service_type | volume                                  |
| url          | http://controller:8776/v1/%(tenant_id)s |
+--------------+-----------------------------------------+
[root@controller ~]# openstack endpoint create --region RegionOne \
 volume internal http://controller:8776/v1/%\(tenant_id\)s
+--------------+-----------------------------------------+
| Field        | Value                                   |
+--------------+-----------------------------------------+
| enabled      | True                                    |
| id           | 851a923aeece4ce690118ec651a3dedc        |
| interface    | internal                                |
| region       | RegionOne                               |
| region_id    | RegionOne                               |
| service_id   | e169a871420b492cb2c2ca56ac74c684        |
| service_name | cinder                                  |
| service_type | volume                                  |
| url          | http://controller:8776/v1/%(tenant_id)s |
+--------------+-----------------------------------------+
[root@controller ~]# openstack endpoint create --region RegionOne \
 volume admin http://controller:8776/v1/%\(tenant_id\)s
+--------------+-----------------------------------------+
| Field        | Value                                   |
+--------------+-----------------------------------------+
| enabled      | True                                    |
| id           | 50f353d723d6458fb5e032adccfbda46        |
| interface    | admin                                   |
| region       | RegionOne                               |
| region_id    | RegionOne                               |
| service_id   | e169a871420b492cb2c2ca56ac74c684        |
| service_name | cinder                                  |
| service_type | volume                                  |
| url          | http://controller:8776/v1/%(tenant_id)s |
+--------------+-----------------------------------------+
V2版本
[root@controller ~]# openstack endpoint create --region RegionOne \
 volumev2 public http://controller:8776/v2/%\(tenant_id\)s
+--------------+-----------------------------------------+
| Field        | Value                                   |
+--------------+-----------------------------------------+
| enabled      | True                                    |
| id           | 174d1a355ec642129a3d5cd0c67ed4d6        |
| interface    | public                                  |
| region       | RegionOne                               |
| region_id    | RegionOne                               |
| service_id   | 4217acf2eb8347bfa29eb89e7ac451e9        |
| service_name | cinderv2                                |
| service_type | volumev2                                |
| url          | http://controller:8776/v2/%(tenant_id)s |
+--------------+-----------------------------------------+
[root@controller ~]# openstack endpoint create --region RegionOne \
 volumev2 internal http://controller:8776/v2/%\(tenant_id\)s
+--------------+-----------------------------------------+
| Field        | Value                                   |
+--------------+-----------------------------------------+
| enabled      | True                                    |
| id           | 89567578728849e0b78c56ef977e2997        |
| interface    | internal                                |
| region       | RegionOne                               |
| region_id    | RegionOne                               |
| service_id   | 4217acf2eb8347bfa29eb89e7ac451e9        |
| service_name | cinderv2                                |
| service_type | volumev2                                |
| url          | http://controller:8776/v2/%(tenant_id)s |
+--------------+-----------------------------------------+
[root@controller ~]# openstack endpoint create --region RegionOne \
 volumev2 admin http://controller:8776/v2/%\(tenant_id\)s
+--------------+-----------------------------------------+
| Field        | Value                                   |
+--------------+-----------------------------------------+
| enabled      | True                                    |
| id           | 61c14bbcb7874d7288eaafdcf42902cc        |
| interface    | admin                                   |
| region       | RegionOne                               |
| region_id    | RegionOne                               |
| service_id   | 4217acf2eb8347bfa29eb89e7ac451e9        |
| service_name | cinderv2                                |
| service_type | volumev2                                |
| url          | http://controller:8776/v2/%(tenant_id)s |
+--------------+-----------------------------------------+
块设备存储服务每个服务实体都需要端点。
2.2安全并配置组件
2.2.1安装软件包
[root@controller ~]# yum install openstack-cinder -y
2.2.2编辑 /etc/cinder/cinder.conf,同时完成如下动作
cp /etc/cinder/cinder.conf{,.bak}
grep '^\[' /etc/cinder/cinder.conf.bak >/etc/cinder/cinder.conf
vim /etc/cinder/cinder.conf
- 在 [database] 部分,配置数据库访问
[database]
...
connection = mysql+pymysql://cinder:CINDER_DBPASS@controller/cinder
用你为块设备存储数据库选择的密码替换 CINDER_DBPASS
- 在 “[DEFAULT]” 和 “[oslo_messaging_rabbit]”部分,配置 “RabbitMQ” 消息队列访问:
[DEFAULT]
...
rpc_backend = rabbit

[oslo_messaging_rabbit]
...
rabbit_host = controller
rabbit_userid = openstack
rabbit_password = RABBIT_PASS
用你在 “RabbitMQ” 中为 “openstack” 选择的密码替换 “RABBIT_PASS”
- 在 “[DEFAULT]” 和 “[keystone_authtoken]” 部分,配置认证服务访问
[DEFAULT]
...
auth_strategy = keystone

[keystone_authtoken]
...
auth_uri = http://controller:5000
auth_url = http://controller:35357
memcached_servers = controller:11211
auth_type = password
project_domain_name = default
user_domain_name = default
project_name = service
username = cinder
password = cinder
将 CINDER_PASS 替换为你在认证服务中为 cinder 用户选择的密码
- 在 [DEFAULT] 部分,配置“my_ip“ 来使用控制节点的管理接口的IP 地址。
[DEFAULT]
...
my_ip = 118.190.201.11
- 在 [oslo_concurrency] 部分,配置锁路径:
[oslo_concurrency]
...
lock_path = /var/lib/cinder/tmp
- MD5值及完整内容
#MD5值
[root@controller ~]# md5sum /etc/cinder/cinder.conf
c2050e92c76553ec761ae9717a9c35a4 /etc/cinder/cinder.conf
#配置文件内容
[root@controller ~]# cat /etc/cinder/cinder.conf
[DEFAULT]
rpc_backend = rabbit
auth_strategy = keystone
my_ip = 118.190.201.11
[BACKEND]
[BRCD_FABRIC_EXAMPLE]
[CISCO_FABRIC_EXAMPLE]
[COORDINATION]
[FC-ZONE-MANAGER]
[KEYMGR]
[cors]
[cors.subdomain]
[database]
connection = mysql+pymysql://cinder:CINDER_DBPASS@controller/cinder
[keystone_authtoken]
auth_uri = http://controller:5000
auth_url = http://controller:35357
memcached_servers = controller:11211
auth_type = password
project_domain_name = default
user_domain_name = default
project_name = service
username = cinder
password = cinder
[matchmaker_redis]
[oslo_concurrency]
lock_path = /var/lib/cinder/tmp
[oslo_messaging_amqp]
[oslo_messaging_notifications]
[oslo_messaging_rabbit]
rabbit_host = controller
rabbit_userid = openstack
rabbit_password = RABBIT_PASS
[oslo_middleware]
[oslo_policy]
[oslo_reports]
[oslo_versionedobjects]
[ssl]
2.2.3初始化块设备服务的数据库
[root@controller ~]# su -s /bin/sh -c "cinder-manage db sync" cinder
2018-07-21 07:34:16.563 51671 INFO migrate.versioning.api [-] 70 -> 71...
2018-07-21 07:34:16.592 51671 INFO migrate.versioning.api [-] done
2018-07-21 07:34:16.593 51671 INFO migrate.versioning.api [-] 71 -> 72...
2018-07-21 07:34:16.644 51671 INFO migrate.versioning.api [-] done
忽略输出中任何不推荐使用的信息。
2.3配置计算服务使用块设备存储
1.编辑文件 /etc/nova/nova.conf 并添加如下到其中
[cinder]
os_region_name = RegionOne
2.完整配置文件内容
[root@controller ~]# cat /etc/nova/nova.conf
[DEFAULT]
enabled_apis = osapi_compute,metadata
rpc_backend = rabbit
auth_strategy = keystone
my_ip = 118.190.201.11
use_neutron = True
firewall_driver = nova.virt.firewall.NoopFirewallDriver
[api_database]
connection = mysql+pymysql://nova:NOVA_DBPASS@controller/nova_api
[barbican]
[cache]
[cells]
[cinder]
os_region_name = RegionOne
[conductor]
[cors]
[cors.subdomain]
[database]
connection = mysql+pymysql://nova:NOVA_DBPASS@controller/nova
[ephemeral_storage_encryption]
[glance]
api_servers = http://controller:9292
[guestfs]
[hyperv]
[image_file_url]
[ironic]
[keymgr]
[keystone_authtoken]
auth_uri = http://controller:5000
auth_url = http://controller:35357
memcached_servers = controller:11211
auth_type = password
project_domain_name = default
user_domain_name = default
project_name = service
username = nova
password = NOVA_PASS
[libvirt]
[matchmaker_redis]
[metrics]
[neutron]
url = http://controller:9696
auth_url = http://controller:35357
auth_type = password
project_domain_name = default
user_domain_name = default
region_name = RegionOne
project_name = service
username = neutron
password = NEUTRON_PASS
service_metadata_proxy = True
metadata_proxy_shared_secret = METADATA_SECRET
[osapi_v21]
[oslo_concurrency]
lock_path = /var/lib/nova/tmp
[oslo_messaging_amqp]
[oslo_messaging_notifications]
[oslo_messaging_rabbit]
rabbit_host = controller
rabbit_userid = openstack
rabbit_password = RABBIT_PASS
[oslo_middleware]
[oslo_policy]
[rdp]
[serial_console]
[spice]
[ssl]
[trusted_computing]
[upgrade_levels]
[vmware]
[vnc]
vncserver_listen = $my_ip
vncserver_proxyclient_address = $my_ip
[workarounds]
[xenserver]
2.4完成安装
1.重启计算API 服务
[root@controller ~]# systemctl restart openstack-nova-api.service
2.启动块设备存储服务,并将其配置为开机自启
[root@controller ~]# systemctl enable openstack-cinder-api.service openstack-cinder-scheduler.service
[root@controller ~]# systemctl start openstack-cinder-api.service openstack-cinder-scheduler.service
3.验证
#端口
[root@controller ~]# netstat -lntup|grep 8776
tcp       0        0 0.0.0.0:8776         0.0.0.0:*         LISTEN          51884/python2
#服务
[root@controller ~]# cinder service-list   ##没加存储节点
+------------------+------------+------+---------+-------+----------------------------+-----------------+
| Binary           | Host       | Zone | Status  | State | Updated_at                 | Disabled Reason |
+------------------+------------+------+---------+-------+----------------------------+-----------------+
| cinder-scheduler | controller | nova | enabled | up    | 2018-07-20T23:49:01.000000 |        -        |
+------------------+------------+------+---------+-------+----------------------------+-----------------+
3.在计算节点上安装存储节点
参考资料https://docs.openstack.org/mitaka/zh_CN/install-guide-rdo/cinder-storage-install.html
3.1先决条件
在你安装和配置块存储服务之前,你必须准备好存储设备。
3.1.1安装支持的工具包
- 安装 LVM 包
[root@compute1 ~]# yum install lvm2 -y
- 启动LVM的metadata服务并且设置该服务随系统启动
systemctl enable lvm2-lvmetad.service
systemctl start lvm2-lvmetad.service
3.1.2创建LVM 物理卷 /dev/sdb
#确认添加的磁盘
[root@compute1 ~]# fdisk -l
Disk /dev/sdb: 107.4 GB, 107374182400 bytes, 209715200 sectors
Units = sectors of 1 * 512 = 512 bytes
Sector size (logical/physical): 512 bytes / 512 bytes
I/O size (minimum/optimal): 512 bytes / 512 bytes
#创建LVM 物理卷
[root@compute1 ~]# pvcreate /dev/sdb
 Physical volume "/dev/sdb" successfully created.
3.1.3创建 LVM 卷组 cinder-volumes
#创建LVM卷组
[root@compute1 ~]# vgcreate cinder-volumes /dev/sdb
 Volume group "cinder-volumes" successfully created
#查看卷组
[root@compute1 ~]# pvs
 PV VG Fmt Attr PSize PFree
 /dev/sda2 centos lvm2 a-- <49.51g 44.00m
 /dev/sdb cinder-volumes lvm2 a-- <100.00g <100.00g
[root@compute1 ~]# vgs
 VG #PV #LV #SN Attr VSize VFree
 centos 1 2 0 wz--n- <49.51g 44.00m
 cinder-volumes 1 0 0 wz--n- <100.00g <100.00g
3.1.4编辑“/etc/lvm/lvm.conf“文件并完成下面的操作
只有实例可以访问块存储卷组。不过,底层的操作系统管理这些设备并将其与卷关联。默认情况下,LVM卷扫描工具会扫描“/dev“ 目录,查找包含卷的块存储设备。如果项目在他们的卷上使用LVM,扫描工具检测到这些卷时会尝试缓存它们,可能会在底层操作系统和项目卷上产生各种问题。您必须重新配置LVM,让它只扫描包含“cinder-volume“卷组的设备
- 在“devices“部分,添加一个过滤器,只接受“/dev/sdb“设备,拒绝其他所有设备:
devices {
...
filter = [ "a/sdb/", "r/.*/"]
每个过滤器组中的元素都以“a“开头,即为 accept,或以 r 开头,即为**reject**,并且包括一个设备名称的正则表达式规则。过滤器组必须以“r/.*/“结束,过滤所有保留设备。您可以使用 :命令:`vgs -vvvv` 来测试过滤器。
🔺警告
如果您的存储节点在操作系统磁盘上使用了 LVM,您还必需添加相关的设备到过滤器中。例如,如果 /dev/sda 设备包含操作系统:
filter = [ "a/sda/", "a/sdb/", "r/.*/"]   ##本测试添加的此条规则
#命令
sed -i '110a filter = [ "a/sda/", "a/sdb/", "r/.*/"]' /etc/lvm/lvm.conf

类似地,如果您的计算节点在操作系统磁盘上使用了 LVM,您也必需修改这些节点上 /etc/lvm/lvm.conf 文件中的过滤器,将操作系统磁
盘包含到过滤器中。例如,如果``/dev/sda`` 设备包含操作系统:
filter = [ "a/sda/", "r/.*/"]
3.2安装并配置组件
3.2.1安装软件包
[root@compute1 ~]# yum install openstack-cinder targetcli python-keystone -y
3.2.2编辑 /etc/cinder/cinder.conf,同时完成如下动作
cp /etc/cinder/cinder.conf{,.bak}
grep '^\[' /etc/cinder/cinder.conf.bak >/etc/cinder/cinder.conf
vim /etc/cinder/cinder.conf
- 在 [database] 部分,配置数据库访问
[database]
...
connection = mysql+pymysql://cinder:CINDER_DBPASS@controller/cinder
用你为块设备存储数据库选择的密码替换 CINDER_DBPASS。
- 在 “[DEFAULT]” 和 “[oslo_messaging_rabbit]”部分,配置 “RabbitMQ” 消息队列访问:
[DEFAULT]
...
rpc_backend = rabbit

[oslo_messaging_rabbit]
...
rabbit_host = controller
rabbit_userid = openstack
rabbit_password = RABBIT_PASS
用你在 “RabbitMQ” 中为 “openstack” 选择的密码替换 “RABBIT_PASS”
- 在 “[DEFAULT]” 和 “[keystone_authtoken]” 部分,配置认证服务访问:
[DEFAULT]
...
auth_strategy = keystone

[keystone_authtoken]
...
auth_uri = http://controller:5000
auth_url = http://controller:35357
memcached_servers = controller:11211
auth_type = password
project_domain_name = default
user_domain_name = default
project_name = service
username = cinder
password = cinder
将 CINDER_PASS 替换为你在认证服务中为 cinder 用户选择的密码。
- 在 [DEFAULT] 部分,配置 my_ip 选项
[DEFAULT]
...
my_ip = 118.190.201.31
- 在“[lvm]“部分,配置LVM后端以LVM驱动结束,卷组“cinder-volumes“ ,iSCSI 协议和正确的 iSCSI服务:
[lvm]
...
volume_driver = cinder.volume.drivers.lvm.LVMVolumeDriver
volume_group = cinder-volumes
iscsi_protocol = iscsi
iscsi_helper = lioadm
最后一行手动添加
- 在 [DEFAULT] 部分,启用 LVM 后端:
[DEFAULT]
...
enabled_backends = lvm
- 在 [DEFAULT] 区域,配置镜像服务 API 的位置:
[DEFAULT]
...
glance_api_servers = http://controller:9292
- 在 [oslo_concurrency] 部分,配置锁路径:
[oslo_concurrency]
...
lock_path = /var/lib/cinder/tmp
- 完整配置文件内容
[DEFAULT]
rpc_backend = rabbit
auth_strategy = keystone
my_ip = 118.190.201.31
enabled_backends = lvm
glance_api_servers = http://controller:9292
[BACKEND]
[BRCD_FABRIC_EXAMPLE]
[CISCO_FABRIC_EXAMPLE]
[COORDINATION]
[FC-ZONE-MANAGER]
[KEYMGR]
[cors]
[cors.subdomain]
[database]
connection = mysql+pymysql://cinder:CINDER_DBPASS@controller/cinder
[keystone_authtoken]
auth_uri = http://controller:5000
auth_url = http://controller:35357
memcached_servers = controller:11211
auth_type = password
project_domain_name = default
user_domain_name = default
project_name = service
username = cinder
password = cinder
[matchmaker_redis]
[oslo_concurrency]
lock_path = /var/lib/cinder/tmp
[oslo_messaging_amqp]
[oslo_messaging_notifications]
[oslo_messaging_rabbit]
rabbit_host = controller
rabbit_userid = openstack
rabbit_password = RABBIT_PASS
[oslo_middleware]
[oslo_policy]
[oslo_reports]
[oslo_versionedobjects]
[ssl]
[lvm]
volume_driver = cinder.volume.drivers.lvm.LVMVolumeDriver
volume_group = cinder-volumes
iscsi_protocol = iscsi
iscsi_helper = lioadm
3.3完成安装
启动块存储卷服务及其依赖的服务,并将其配置为随系统启动
systemctl enable openstack-cinder-volume.service target.service
systemctl start openstack-cinder-volume.service target.service
控制节点验证
[root@controller ~]# cinder service-list
+------------------+--------------+------+---------+-------+----------------------------+-----------------+
| Binary           | Host         | Zone | Status  | State | Updated_at                 | Disabled Reason |
+------------------+--------------+------+---------+-------+----------------------------+-----------------+
| cinder-scheduler | controller   | nova | enabled | up    | 2018-07-24T18:04:01.000000 |        -        |
| cinder-volume    | compute1@lvm | nova | enabled | down  | 2018-07-24T18:01:23.000000 |        -        |
+------------------+--------------+------+---------+-------+----------------------------+-----------------+
#发现是down的状态
[root@controller ~]# systemctl restart chronyd  #所有节点执行重启时间服务即可
[root@controller ~]# cinder service-list
+------------------+--------------+------+---------+-------+----------------------------+-----------------+
| Binary           | Host         | Zone | Status  | State | Updated_at                 | Disabled Reason |
+------------------+--------------+------+---------+-------+----------------------------+-----------------+
| cinder-scheduler | controller   | nova | enabled | up    | 2018-07-25T04:00:13.000000 |       -         |
| cinder-volume    | compute1@lvm | nova | enabled | up    | 2018-07-25T04:00:11.000000 |       -         |
+------------------+--------------+------+---------+-------+----------------------------+-----------------+
你的OpenStack环境现在已经包含了块设备存储服务。你可以查看启动实例或者在接下来的章节中添加更多的服务到你的环境中。。
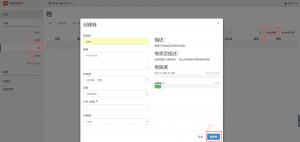
4.在web界面添加云硬盘
创建卷

计算节点查看
[root@compute1 ~]# lvs
 LV     VG         Attr           LSize     Pool     Origin    Data%    Meta%    Move    Log    Cpy%Sync    Convert
 root   centos     -wi-ao----     47.46g
 swap   centos     -wi-ao----     2.00g
 volume-8c5556c1-082e-4496-bb29-f9c3bee77d45  cinder-volumes -wi-a----- 1.00g
将硬盘添加到云主机自选

在存储节点上查看刚才创建的云硬盘 lvdisplay
[root@compute1 ~]# lvdisplay
 --- Logical volume ---
 LV Path /dev/centos/swap
 LV Name swap
 VG Name centos
 LV UUID DpvBdb-JBvb-8FDQ-QueO-Oswe-vtF2-vnJDqQ
 LV Write Access read/write
 LV Creation host, time linux-node1.example.com, 2018-07-13 09:39:02 +0800
 LV Status available
 # open 2
 LV Size 2.00 GiB
 Current LE 512
 Segments 1
 Allocation inherit
 Read ahead sectors auto
 - currently set to 8192
 Block device 253:1

 --- Logical volume ---
 LV Path /dev/centos/root
 LV Name root
 VG Name centos
 LV UUID BAqU5M-Kmhw-PPgW-MoT6-uNNK-NVRg-eduAnp
 LV Write Access read/write
 LV Creation host, time linux-node1.example.com, 2018-07-13 09:39:03 +0800
 LV Status available
 # open 1
 LV Size 47.46 GiB
 Current LE 12151
 Segments 1
 Allocation inherit
 Read ahead sectors auto
 - currently set to 8192
 Block device 253:0

 --- Logical volume ---
 LV Path /dev/cinder-volumes/volume-8c5556c1-082e-4496-bb29-f9c3bee77d45
 LV Name volume-8c5556c1-082e-4496-bb29-f9c3bee77d45
 VG Name cinder-volumes
 LV UUID pO46nD-uneI-zXj2-sXz5-462J-fUh4-p8ueuR
 LV Write Access read/write
 LV Creation host, time compute1, 2018-07-25 12:14:46 +0800
 LV Status available
 # open 1
 LV Size 1.00 GiB
 Current LE 256
 Segments 1
 Allocation inherit
 Read ahead sectors auto
 - currently set to 8192
 Block device 253:2
注意:删除的时候需要卸载umont,在进行删除
- 转载请注明来源:OpenStack系列九之块存储服务Cinder
- 本文永久链接地址:https://www.xionghaier.cn/archives/564.html